Submitting leads through your Landingi form

Updated at: Created at:
This article will give you a little guidance in setting up your Landingi form to post leads directly into LeadByte.
LeadByte settings:
Campaign - Starting with the basics, you'll need a campaign set up in LeadByte to receive the leads from Landingi. These articles can help if you've never done this before - Campaigns and Campaign Fields.
REST API Key - The green boxes are what is typically used for submitting leads via the REST API. However you'll also need to grant "read campaigns" when submitting via Landingi
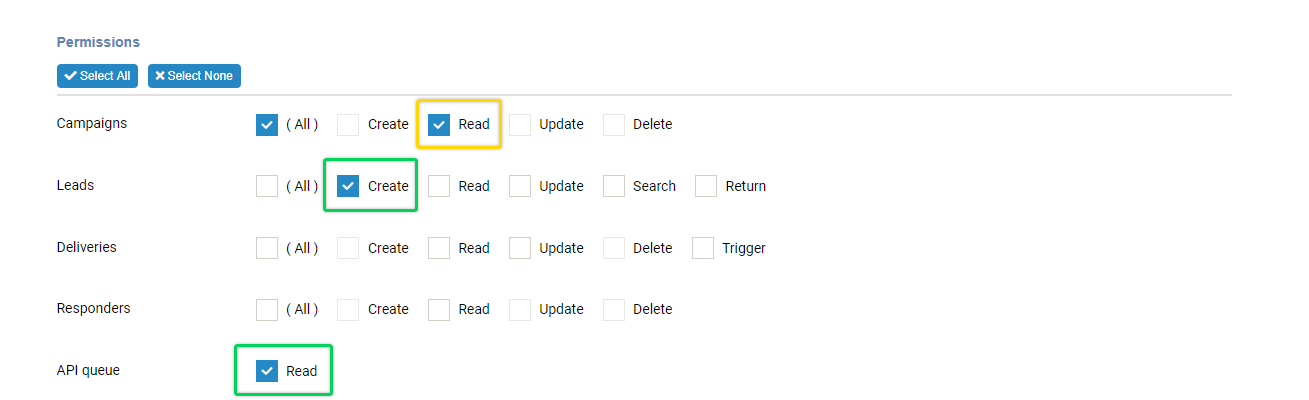
Make sure your API Key is activated and you copy the API Key somewhere as you'll need to use it in the next part. Click here for a little more detail on setting up your REST API key.
Landingi settings:
Create your landing page and add your form

Once your form fields are added, click on your form and follow the path - Settings > Integrations (LeadByte).
From here you'll be able to fill in your details. See below example for an idea of how it's done:
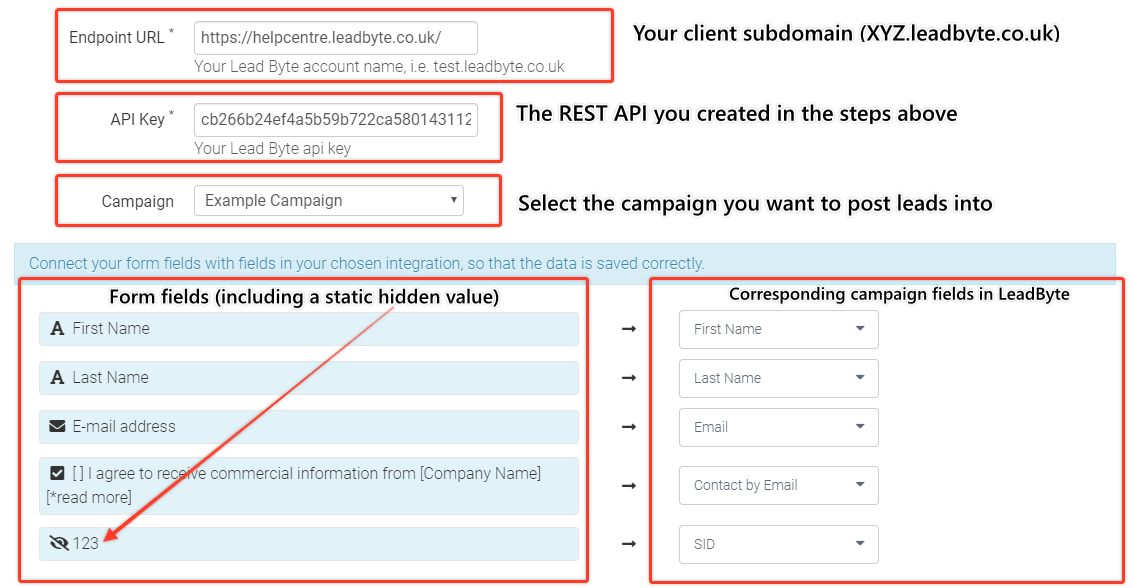
PLEASE NOTE - You will need to pass the field SID to LeadByte when submitting via the REST API.
In the example shown above I've used a hidden field on the form to complete this.
If you'd like to capture values from the URL then take a look at this article:
Using Javascript to capture URL params on Landingi
If you have any questions, please reach out to us by raising a support ticket.
Comments